It can feel pretty chaotic when you have a lot of open windows on your Mac that are different sizes, but there's an easy way to organize the mess in just a few seconds.
I regularly have a ton of windows open across my MacBook and external displays. Right now, I have 11 apps open with 24 windows spread across them. With that many windows, I could split them into different desktop spaces, but I like them all in one since I need to look at multiple windows from various apps simultaneously.

Because of that, I tend to arrange my apps in cascading windows and hide or minimize the ones I use less frequently to quickly tell which window is which. Mission Control usually does the trick if I can't locate a window at a glance.
But when all the windows are different sizes, it looks like a giant, cluttered mess, resulting in me having to try and manually resize each window over and over again, breaking up my workflow multiple times throughout the day. There were tricks to resizing all windows on macOS using Apple Scripts and third-party apps like Magnet, but there's an easier way on macOS 12 Monterey and newer.
Configure a Resize Windows shortcut
You can quickly build a window-resizing macro on your Mac using the Shortcuts app, which only requires a few actions. Open Shortcuts, then create a new shortcut:
Press Command-N
Go to File » New Shortcut in your menu bar
Click the ➕ (plus sign) near the search bar
Search for and add "Find Windows" to the workflow as the first action. By default, sorting is disabled, but select "None" in the sorting drop-down to change it to one of the following:
App Name
Width
Height
X Position
Y Position
Window Index
Name
Random
None
You can also limit the number of windows your shortcut applies to via the "Limit" checkbox. Check it, then select the number of windows it should get. Alternatively, click the More (•••) button next to "Limit" to switch to "Ask Each Time" or "Shortcut Input."
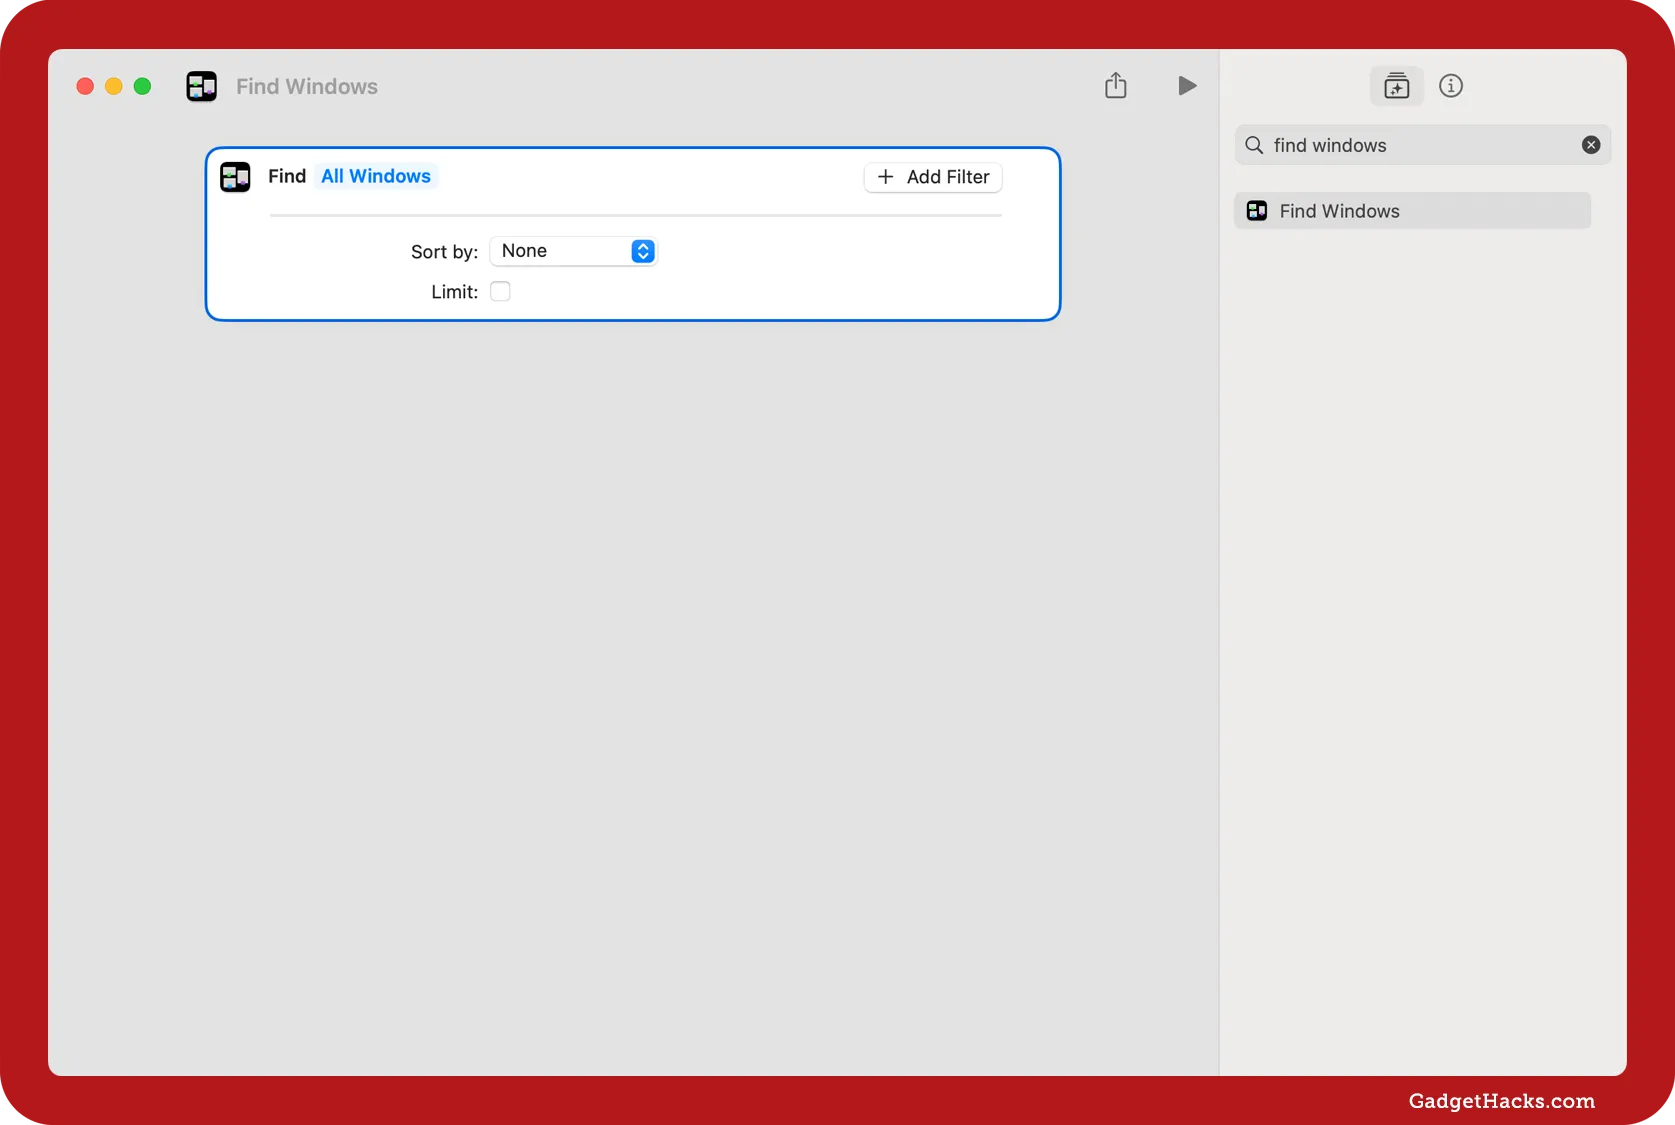
Then, search for and add "Resize Window" as the second action. Checking "Bring to Front" will bring each window to the front placement on your desktop in the order they are resized.
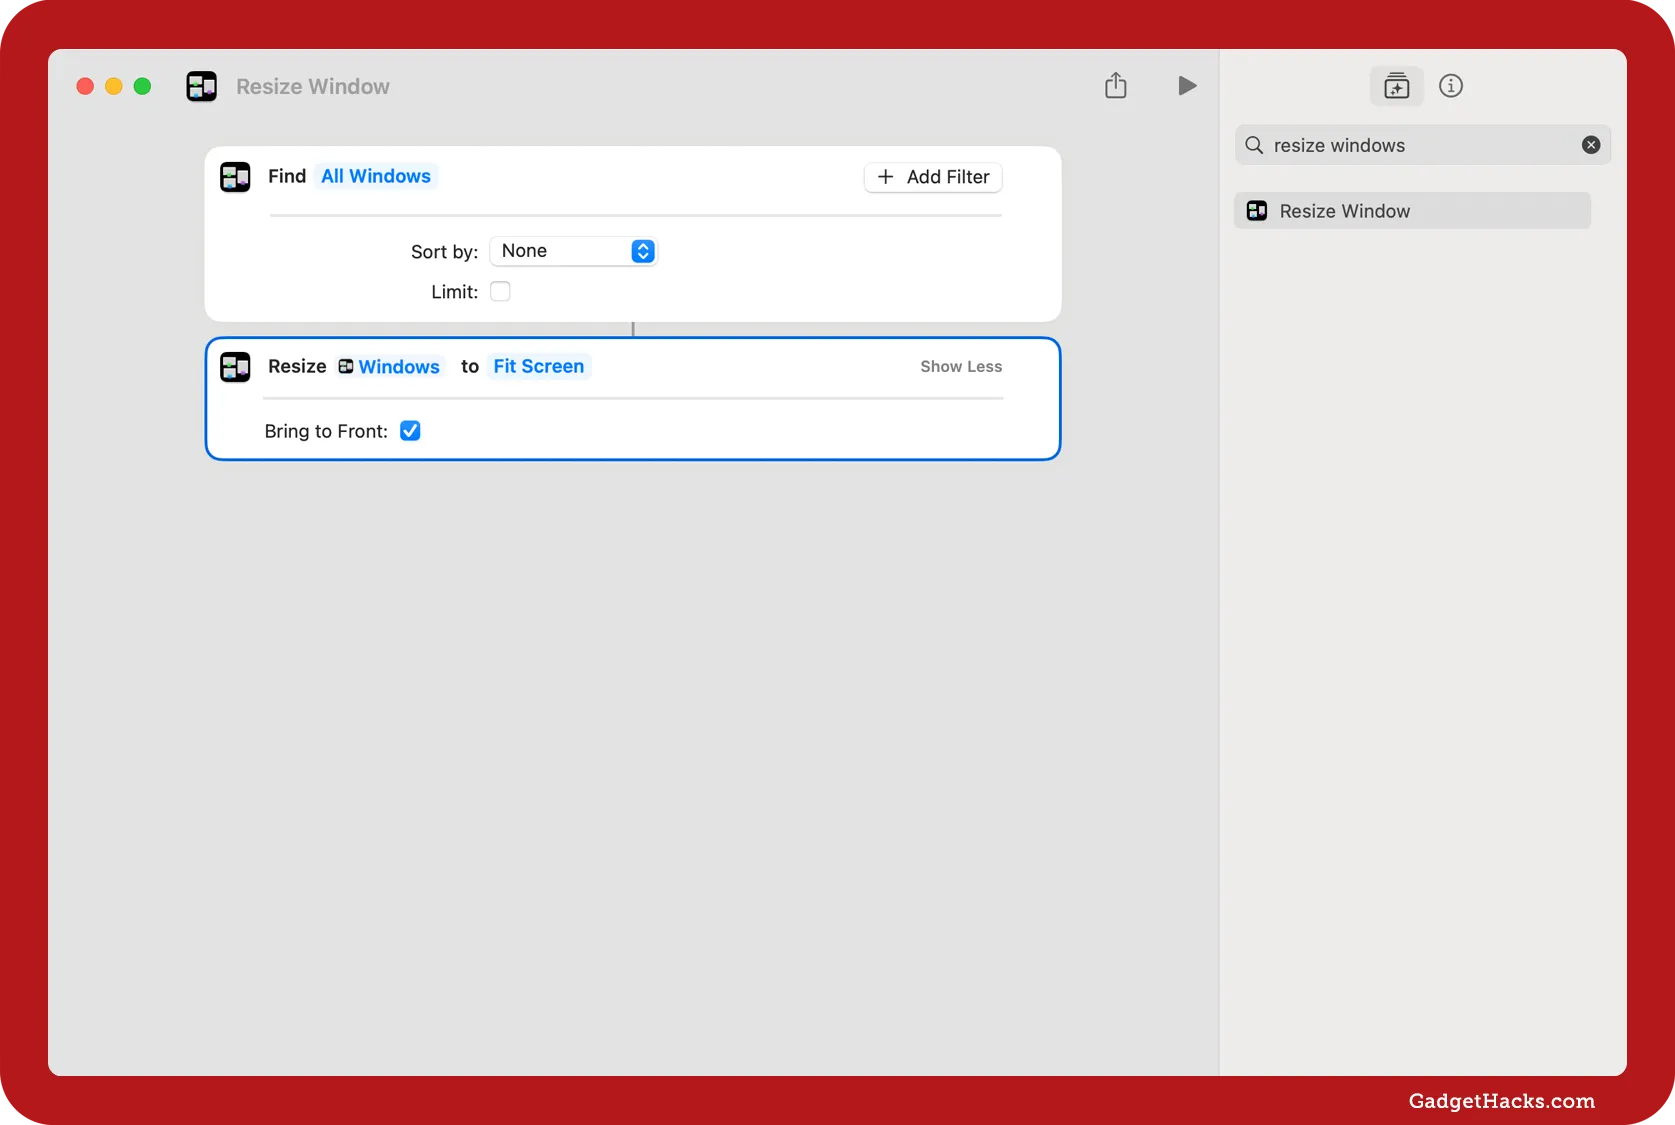
If you did it in that order, Resize Window would use the first action's results as the variable, but you'll need to pick how you want the windows resized. "Fit Screen" is chosen by default, but you can click that to select a different sizing method. You can choose between:
Fit Screen
Top Half
Bottom Half
Left Half
Right Half
Top Left Quarter
Top Right Quarter
Bottom Left Quarter
Bottom Right Quarter
Dimensions
Select Variable
Ask Each Time
Shortcut Input
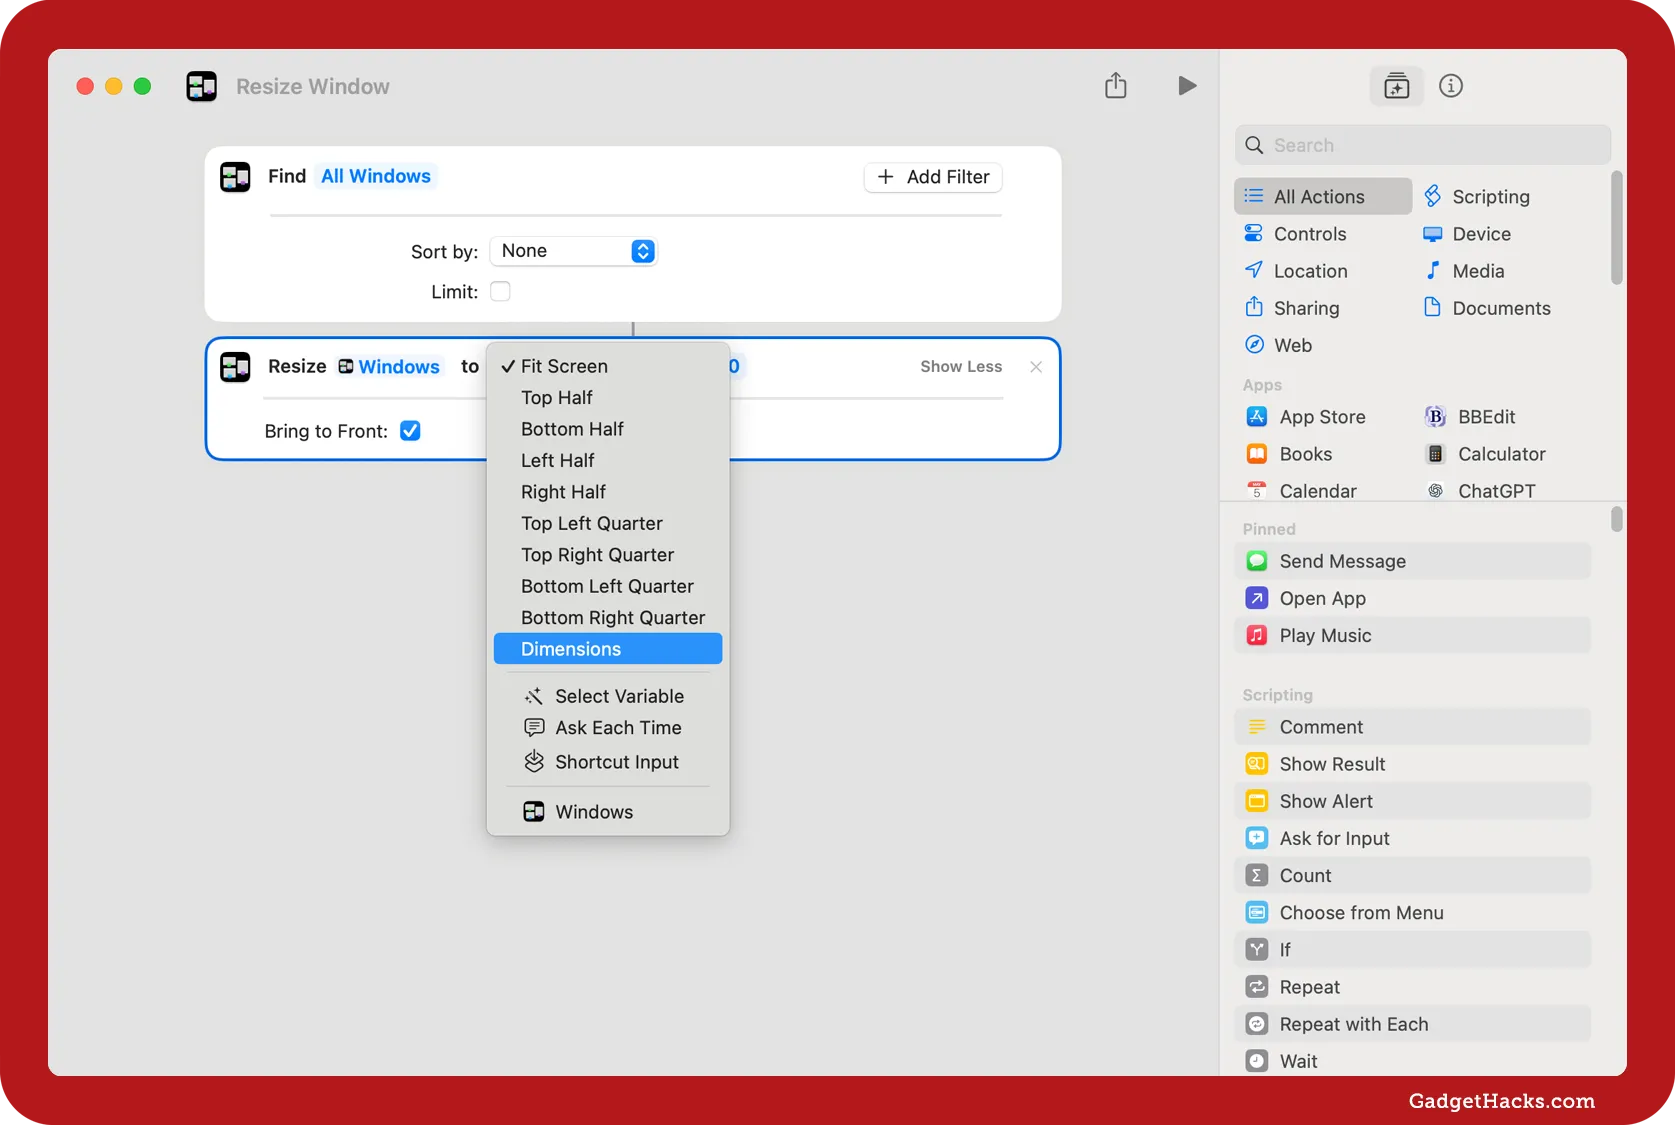
For me, "Dimensions" makes the most sense; I want all windows to be the same size, no matter what display they're on, without forcing them into a specific spot on the screens. If you choose that, add the width and height in pixels that each window should be.
Try this shortcut out: Resize All Windows to Preferred Dimensions
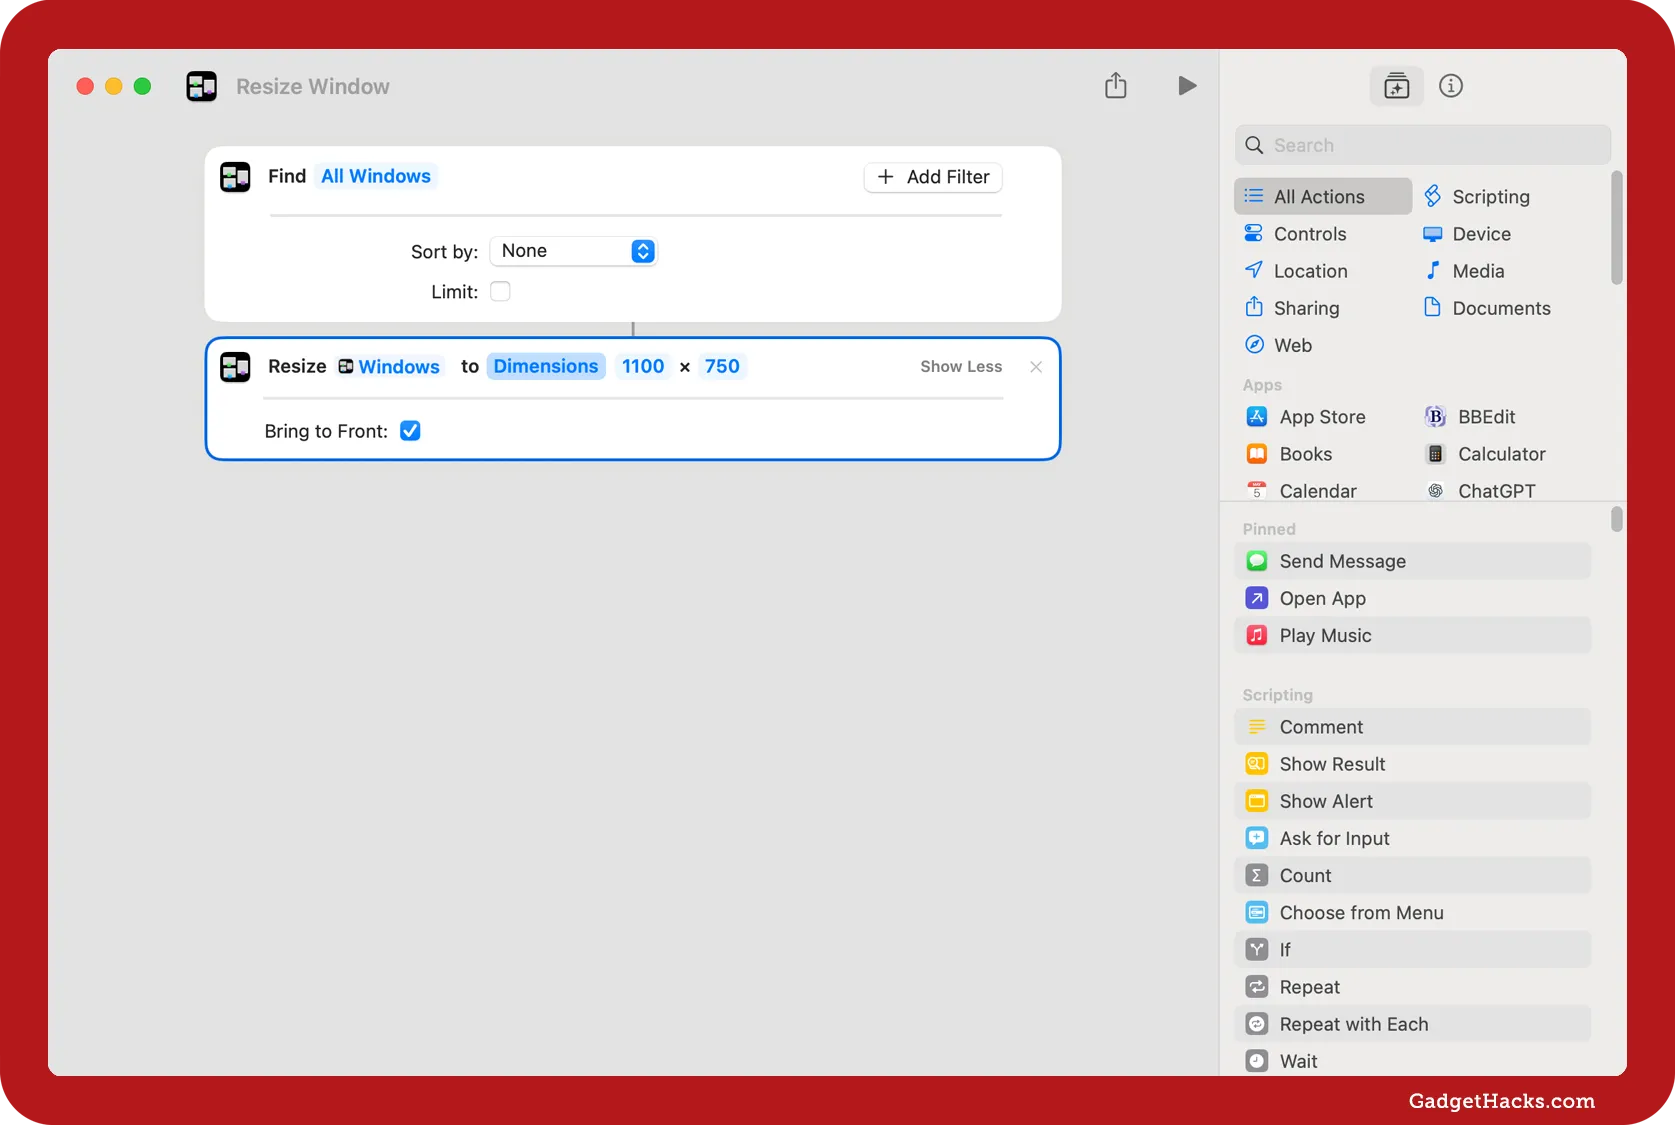
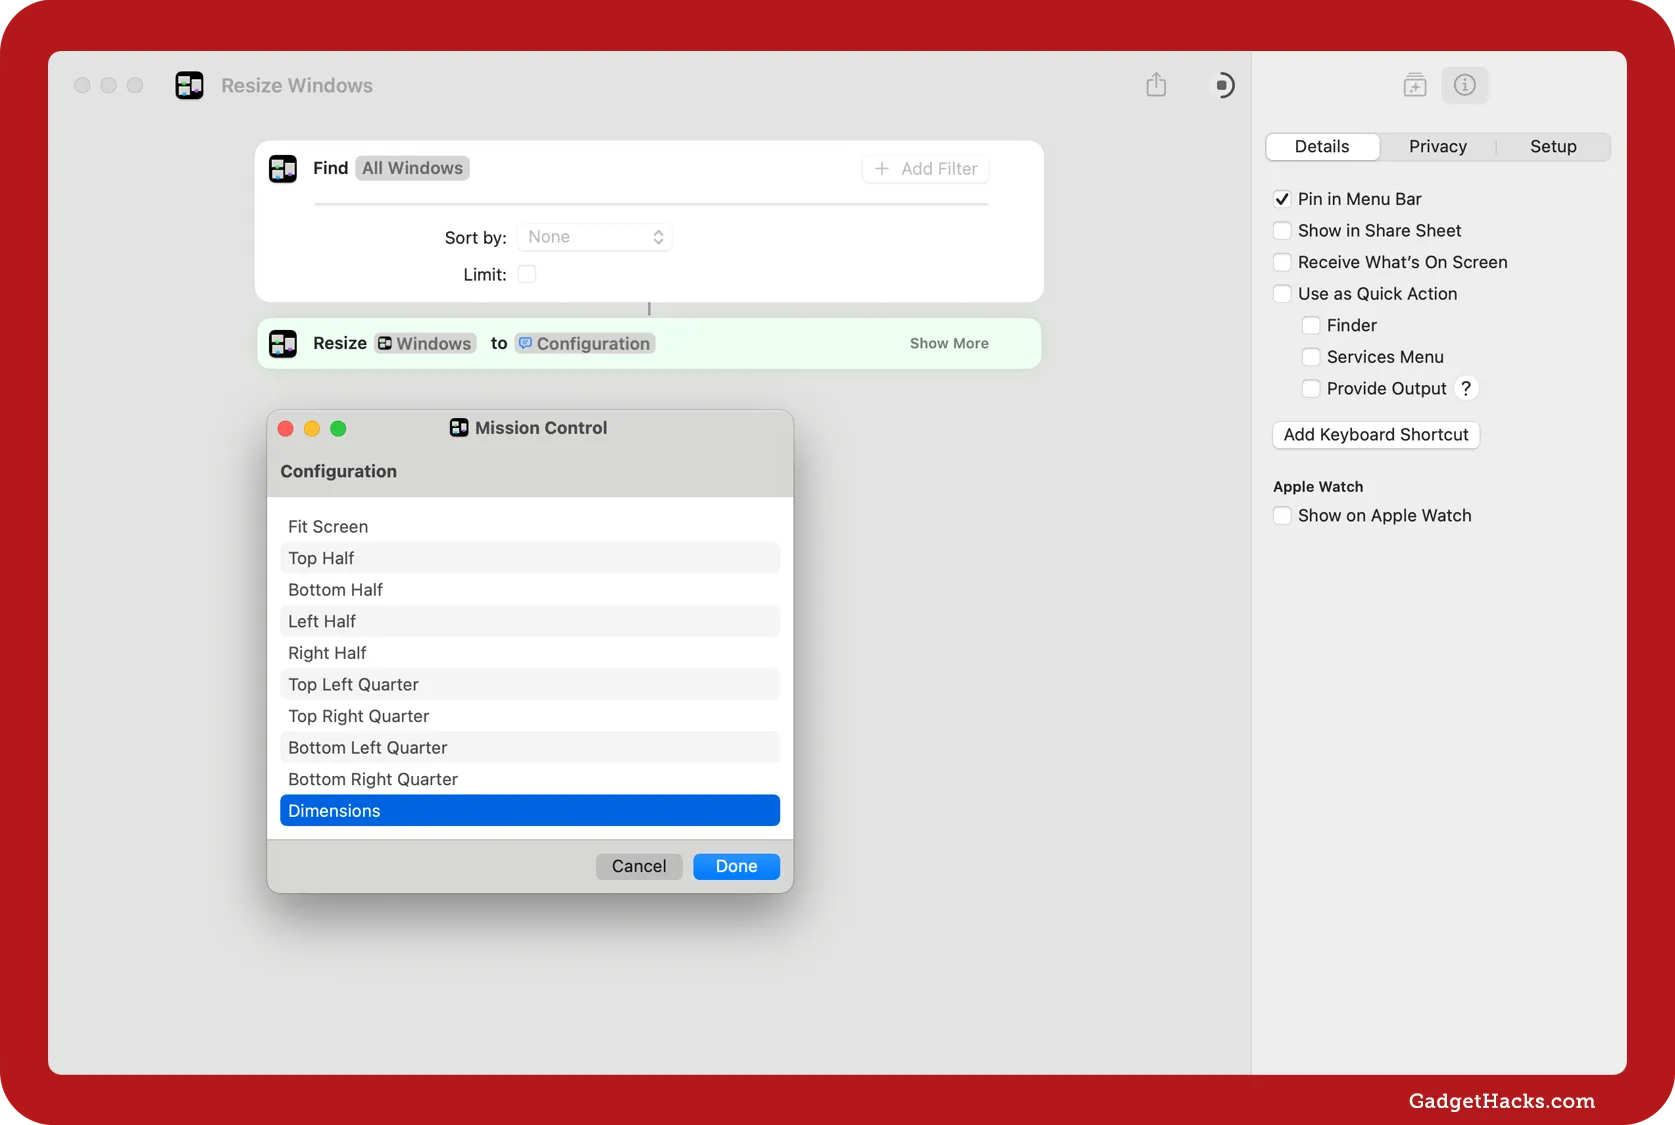
If you don't want to commit to any size or position, leave it open with "Ask Each Time." When you run the shortcut, it will ask you which option you want each time.
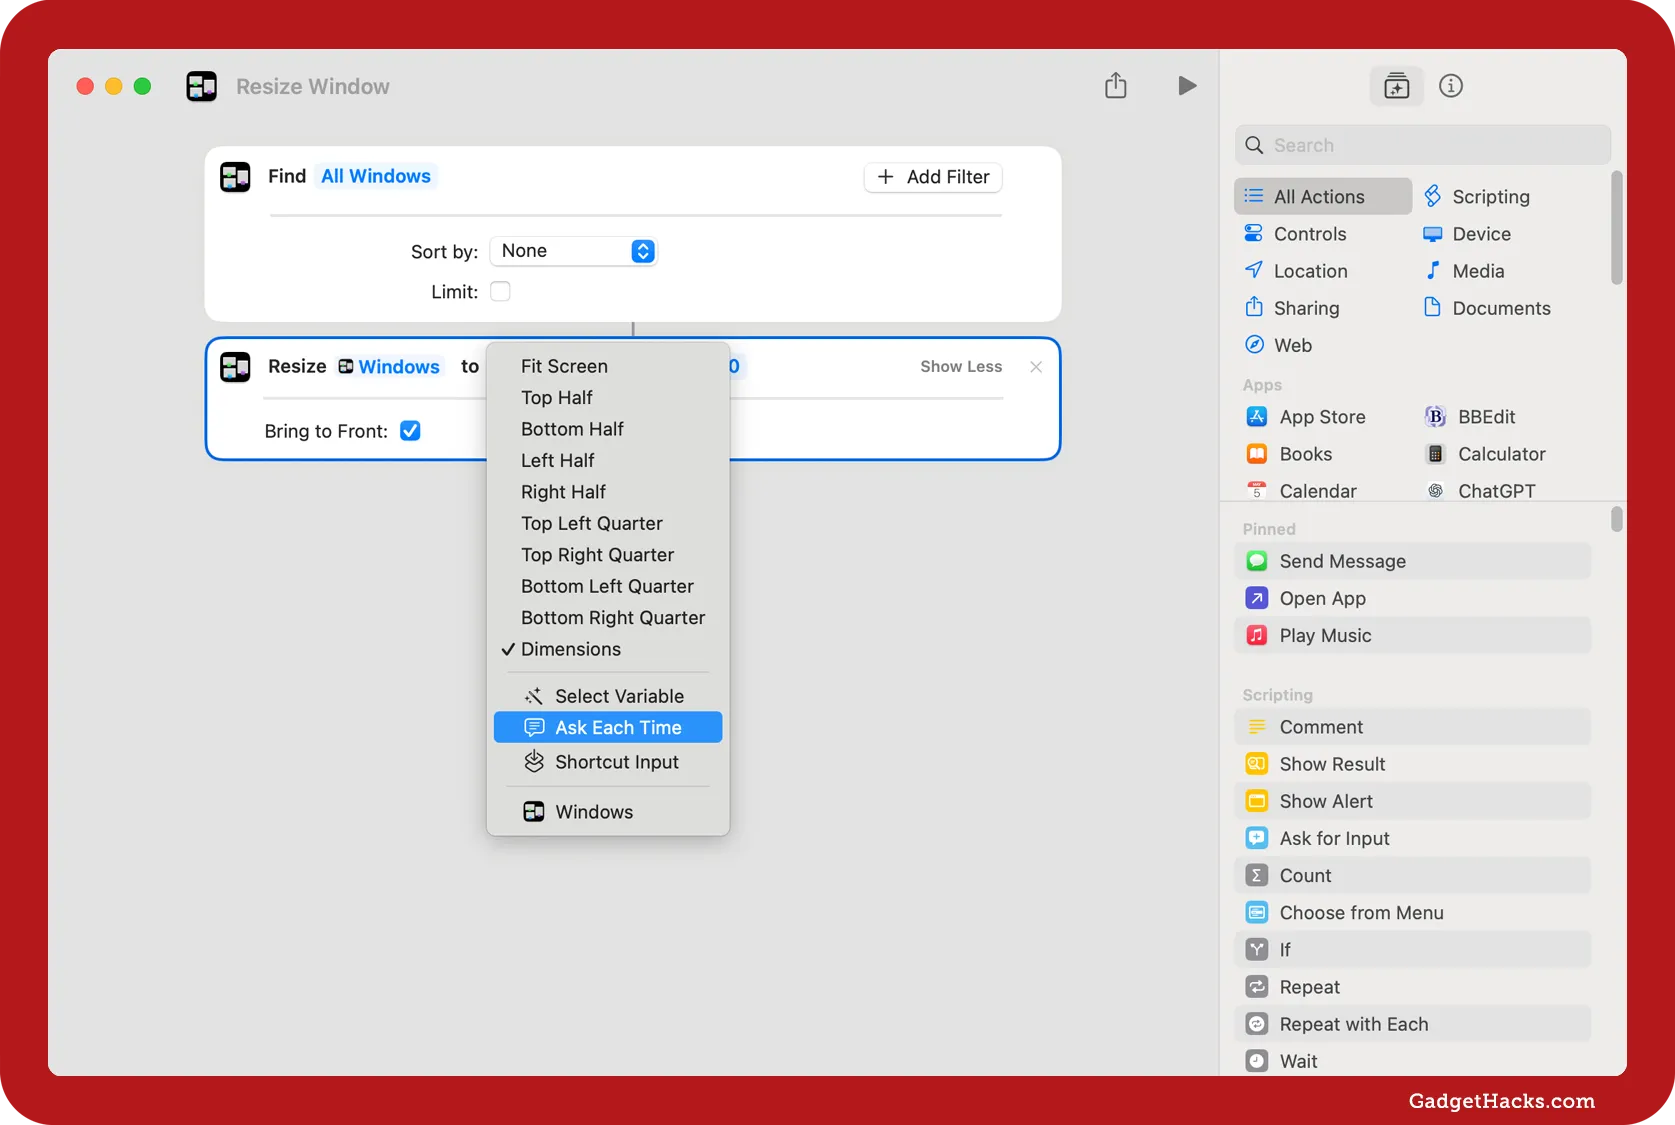
And that's all there is to it, besides giving the shortcut a name. When you run the shortcut from the Shortcuts app or using Siri, it will provide you with the desired output.
Variations
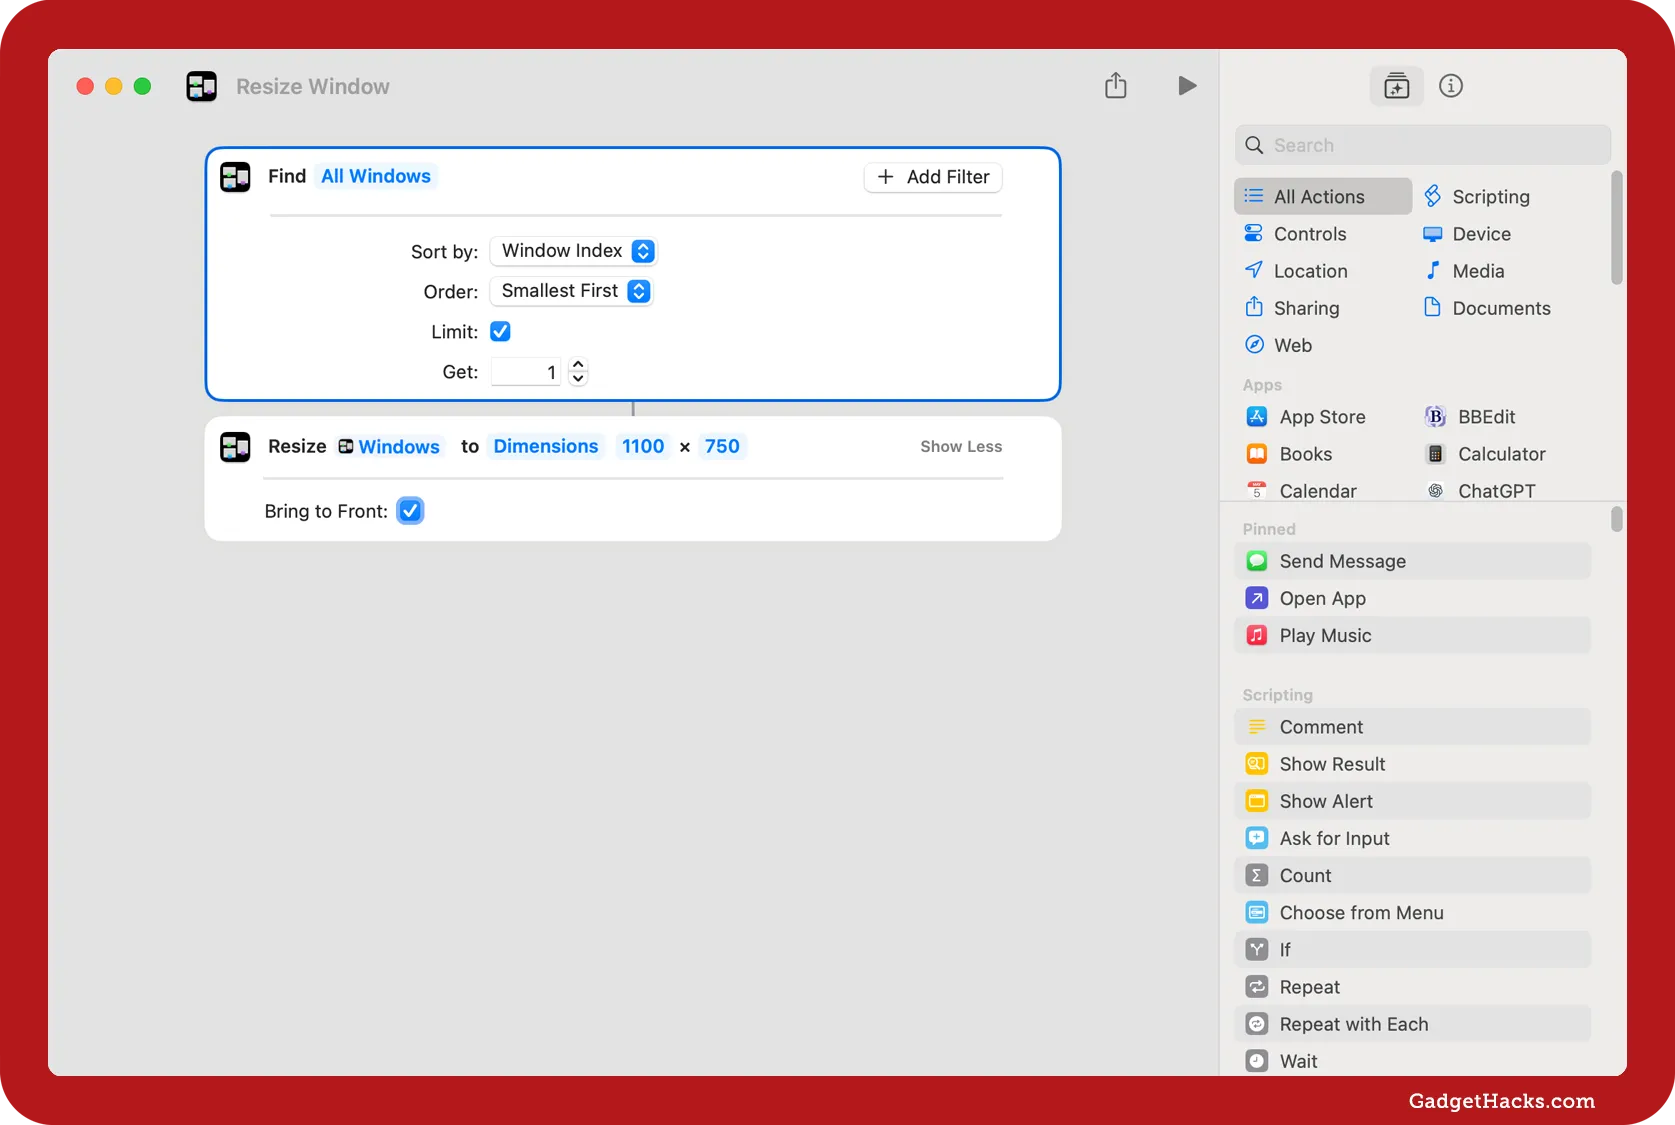
You could build on this shortcut if you want different apps to have different-sized windows or if you want to move windows to another location, so feel free to play around. For example, if you only want to resize your most current window, set the Find Windows action to:
Sort by: Window Index
Order: Smallest First
Limit: True
Get: 1
Try this shortcut out: Resize Last Window to Preferred Dimensions (Simple Version)
And here are some more options:
Access the Resize Windows shortcut faster
If you want an even easier way to run the shortcut, open the editor back up for the shortcut, then do one of the following:
Click on the "Shortcut Details" button.
Use the Option-Command-2 keyboard shortcut.
Go to View » Show Shortcut Details in the menu bar.
From the Shortcut Details, you can:
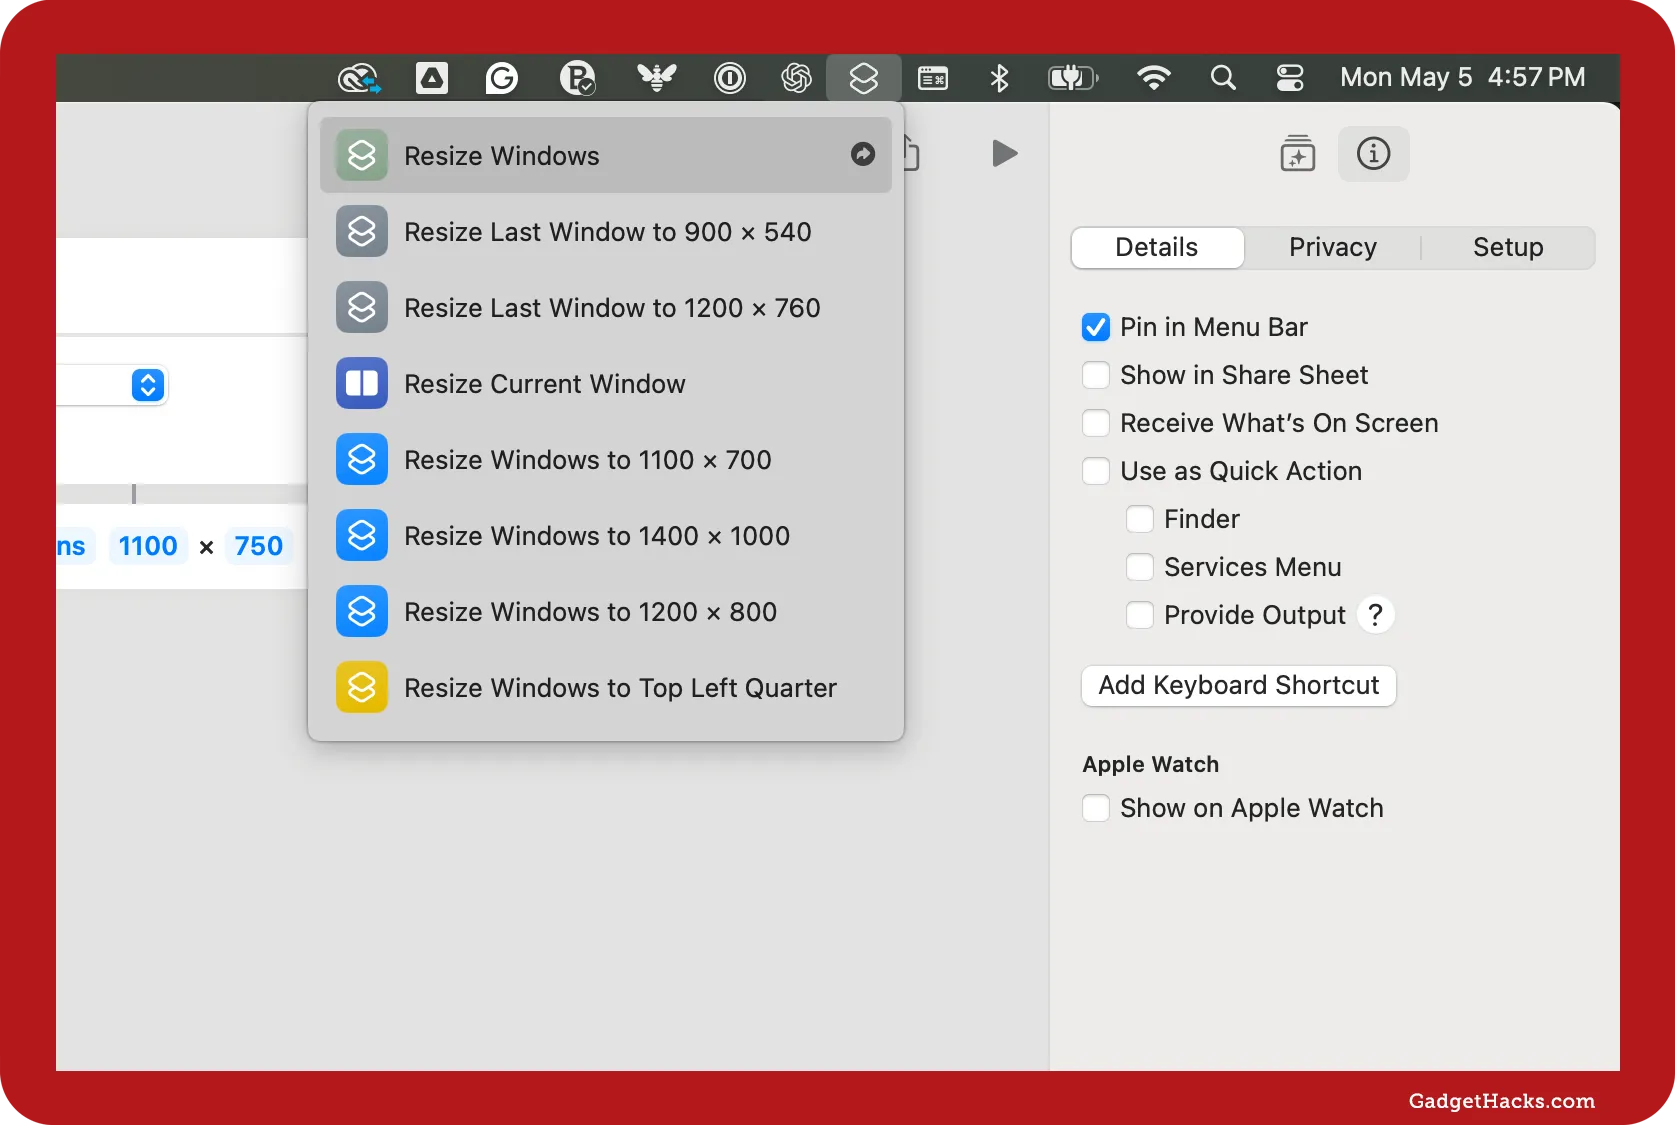
Pin in Menu Bar: The Shortcuts app icon will appear in your Mac's menu bar. Click that, then the shortcut you want to run. All menu bar shortcuts will appear in a new "Menu Bar" folder in Shortcuts.
Use as Quick Action: Between Finder, Services Menu, and Provide Output, only the Services Menu makes sense for resizing windows because you can open it from any app's name in the menu bar.
Add Keyboard Shortcut: If you don't want to do any clicking, you can assign a keyboard shortcut of your liking.
Show in Share Sheet: This is the least helpful option since it's the least efficient way to trigger a window-resizing shortcut, but it's there if you want to try it.
Receive What's On Screen: Not applicable to this use case.
Show on Apple Watch: Also not applicable to this use case.
Another option is to add the shortcut to your dock. With the shortcut's editor open, go to File » Add to Dock in the menu bar. You can also right-click on the shortcut's card from your shortcuts list and choose "Add to Dock."

Run the Resize Windows shortcut
No matter how you run the shortcut — from the Shortcuts app or via Siri, the Services menu, your dock, or the menu bar — it will find all the on-screen windows and resize them to your desired dimensions or position. If you limit the number of windows it can get, it will only work on those.
Either way, any hidden or minimized windows will not be changed, so they'll be a different size when you open them.
Also, if using multiple monitors, ensure the windows are on the displays you want before triggering the shortcut. If you drag and drop them between monitors of different resolutions, they may become a different size.

If you set the shortcut to ask what you want to do each time, a Mission Control window will appear where you can pick the action you want. When you choose "Dimensions," you must enter the width and height in pixels.
Don't Miss: The Big Shortcuts Update for iPhone Is Bursting with New Features You Need to Try Out
Cover photo, screenshots, and GIF by Gadget Hacks.











Comments
Be the first, drop a comment!